It's been a lovely weekend, balmy summer weather yesterday. Paul in the garden digging a hole (Paul is my husband. Not the dog) and me in my studio doing something I haven't done for a long time. Putting paint to canvas. And I can tell you, the feeling was amazing! Who knew how much I had missed it without even knowing it?! It felt like the end of lent when you can finally eat chocolate again and it feels like some kind of forbidden fruit and tastes so good that you vow never to be separated again. Holding that paint brush in my hand felt so normal, so natural. I can't believe I have left it this long!
Before I could get in my studio, I had to knock one or two things off my list:
46: I've definitely made the most of this weekend. No boring jobs. Only things I enjoy.
39: Tidy my studio. I can't work in a messy space so this was a must. See below my nice tidy studio. It still doesn't look very tidy, but you didn't see it before!!!
And my inspiration board... That card with the butterfly on it was from Paul for our first wedding anniversary. You may notice a bit of a butterfly theme going on... beaded butterfly magnets, feather butterflies tucked in front of one of the post cards and my card from Paul. There are little butterflies lurking all over my house.
And I'm not sure what this little area is but I like it. It's part of the chimney and you can't really use it for anything so why not stick a couple of cushions and some paintings in it?
So, I'm all set up, my easel is out, canvas in position... ready to start. Please ignore the headless lamp stand behind the canvas! That should have been listed on my 101 in 1001 - Make new lamp shade!!!
This is step two of my creative process: Preparation
First thing I do before I put anything else on my canvas is to tape it up. I don't always do this but as I'm doing a comic style, it needs nice clean, straight edges. So out with the masking tape. As well as wonky lines, I've tried to do them differing thicknesses as well to give the effect of photos just dropped onto a surface.
Step 3: Pencil to canvas
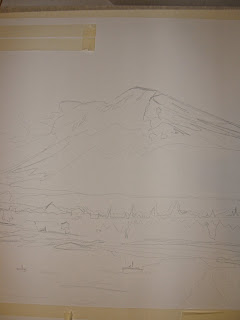
My next step is to roughly sketch my picture onto the canvas. I don't worry too much about getting it right. So long as things are in the right place and faces and things don't look weird, I can always change it with the paint. When it's just lines it won't look quite right anyway. I don't bother with any shading or anything.
In true Rolf Harris Aussie accent....... Can you tell what it is yet?
Step 4: (My favourite bit) Paint to canvas
The next bit is my favourite bit. Getting that paintbrush wet, mixing my colours and starting to build the layers of my painting. The next few steps will probably resemble a paint by numbers. It isn't, I can assure you. I usually build up my paintings in about 5 or 6 layers, gradually adding in detail and texture until it looks like I had imagined.
See, I told you, nothing much to look at yet! You probably won't hear much about this for the next couple of weeks until it's finished because anything I show you now will totally give away the surprise! But I will take photos of the various layers I end up with and the steps it takes me to have a painting that I will be proud to put on my wall and will show them as part of the grand unveiling.
Hope you've all done something fun this weekend. Life is for living, not for working.
Love,
The Princess and her paintbrush x


I am so excited that you are sharing this with us...I have never seen the process done, well, on T.V. I have but that is not the same. This may help me get going on my textile art. Thanks for thinking of us.
ReplyDeleteSo good to hear that you are enjoying your art again. Thank you for sharing the process, it's not something you usually get to see, and I'm hoping this will help me also.
ReplyDeleteHope your week got off to a good start - xxx